You are here
How to Make Bi Bim Bap
If you ever find yourself at a Korean restaurant and unsure about what to order, know that you can't go wrong in ordering bi bim bap (pronounced bee-beem-bahp).
Bi bim means "mixed," while bap means "rice." But bi bim bap is far more than mixed rice. It calls for perfectly cooked rice with a number of well seasoned vegetables, mixed with sesame oil and just a touch of red chili paste. If you enjoy mushrooms, eggs, chicken, or beef, you can add any one or all of these items to create your own version of bi bim bap.
Bi bim bap is the first Korean dish that my mom taught Margaret how to make after we got married. In case you don't know, Margaret is Chinese. Which makes our boys Korean Chinese, which is odd to both me and Margaret; when I look at them, I think of them as being Korean, and when Margaret looks at them, she thinks of them as being Chinese. Well, the truth is that we don't usually think about their mixed background - we just see them as Joshua and Noah, our boys. But I digress...
If you'd like to master bi bim bap to share with family and friends, I trust that you'll find the following guide to be helpful - it includes plenty of pictures and even a couple of videos. Big props to Margaret for thinking to whip out the camera the last time she put together some bi bim bap for her three favorite men.
Okay then, I'll pass the baton off to Margaret...
Bi Bim Bap Recipe
Ingredients:
2 medium zucchini
1 (1.5 lb) bag of spinach
1 large onion
1 large or 2 small carrots
Sesame oil to taste
Olive oil for stir-frying
Sea salt to taste
2 cups of rice, cooked
1 egg for each person
Go-chu-jang (Korean hot chili paste)
Special Equipment Required:
Large steamer
Medium-sized hand-held strainer
Metal tongs
Mandolin (If you don't have a mandolin you can just do a lot of chopping with a knife.)
Directions:
The first step is to bring the water in your steamer to a boil. Once it's boiling, lower the temperature so that the water can simmer.
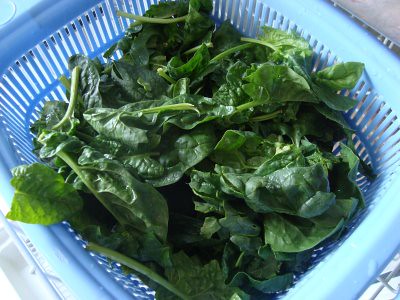
Wash your spinach in a colander.
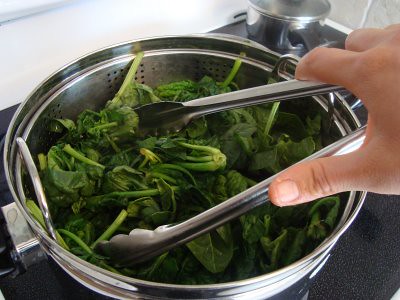
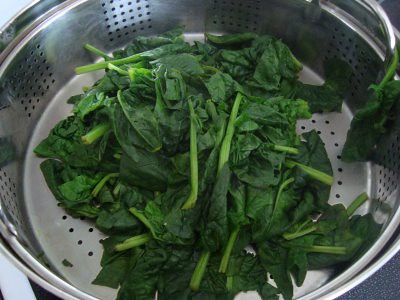
Then put it in the steamer to cook. While it's steaming, stir it around from time to time so that it cooks evenly. Steam until the leaves are wilted but the spinach still retains a bright green color.
Your spinach is finished cooking when it looks like this:
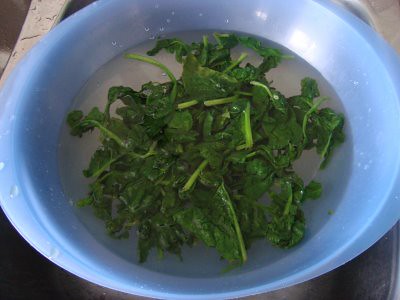
Quickly dunk the spinach into a big basin of cold water so that it stops cooking. This will retain the bright green colour. Use your hands to gently swirl the spinach around in the water.
The blue basin pictured above takes up one entire side of our kitchen sink. If you don't have a basin this size, you can just plug your sink and fill with cold water.
I find it helpful to scoop all of the cooked spinach into a bowl first, and then I dump it from the bowl into the water. If I try to move the spinach from the steamer straight into the water I tend to get burned.
Some people add ice cubes to the water to make it super cold, but I don't (because I usually don't have ice cubes available). I find that cold tap water works fine.
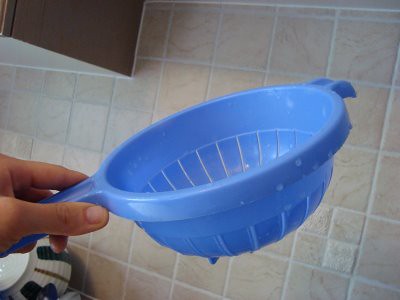
Once the spinach has cooled in the water, scoop it out into a strainer.
What I actually do is place the strainer in a large bowl, then I scoop out the spinach with my hands and place it in the strainer.
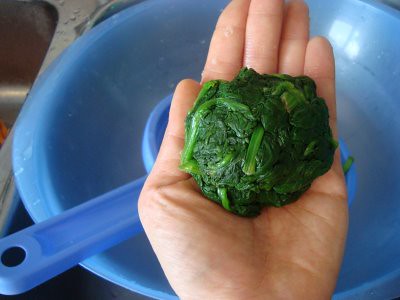
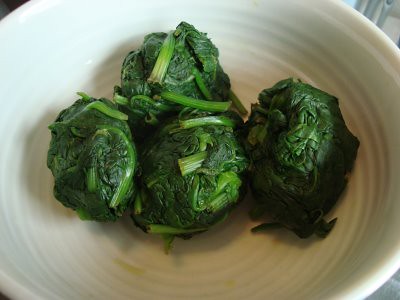
Scoop out a handful of the spinach from the strainer and, using both hands, gently squeeze the moisture from it. You don't need to squeeze it to oblivion; just enough so that it forms a moist spinach-ball like the one pictured below. Repeat this process until you have squeezed the water from all of the spinach.
Once you've completed the spinach-squeezing process you should have a collection that looks like this. Put this bowl aside.
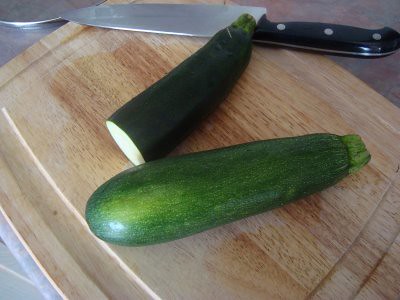
Now take your zucchini and cut one end off.
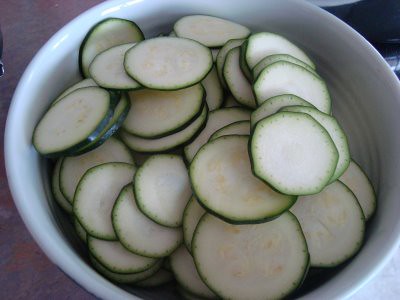
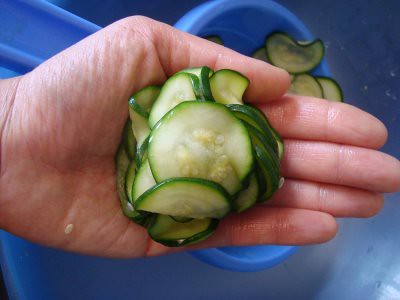
Holding the cut end down, use your mandoline to slice all of the zucchini. Make sure the teeth are out of the mandoline. If the teeth are in, you'll get strips instead of slices. Position the mandoline on a bowl and against a wall so that it holds steady while you're slicing.
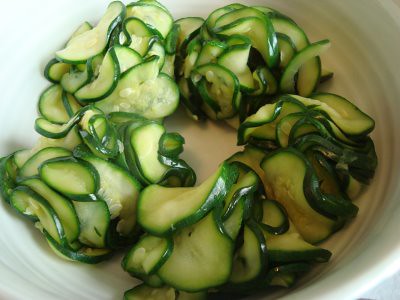
When you're done slicing your zucchini you should have a bowl that looks like this.
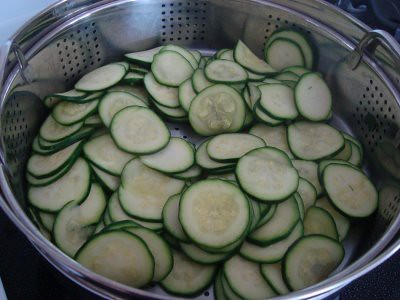
Put your zucchini in the steamer and steam until the zucchini is tender but still retains a bright green colour (see above). It's the same process as with the spinach.
As with the spinach, dunk your steamed zucchini into a pool of cold water to stop it from continuing to cook. Use your hands to gently swirl the zucchini around in the water.
Strain the zucchini and gently squeeze it with both hands. Again, don't squeeze too hard, otherwise the zucchini will fall apart.
Squeeze all of your zucchini until you get a collection that looks like this.
Now, take your bowl of squeezed spinach. Sprinkle it with salt to taste and a drizzle of sesame oil. Get your tongs out and lightly toss the spinach.
At first, using the tips of the tongs and small, light movements, break apart the clusters of spinach. Start off like this:
Once the clusters have been broken apart, you can be more assertive with the tongs to mix well.
Once you've finished tossing the spinach, do the same thing to your zucchini.
Set aside the zucchini and spinach.
Grab your onions and get ready to do some chopping.
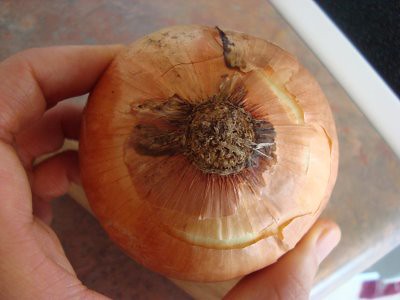
See this end of the onion? It's got what looks like a button. This is the end you want to keep when chopping. Slice off the other end.
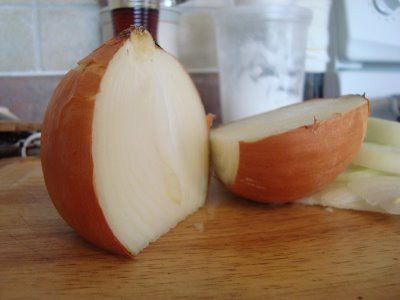
Once you've sliced off the other end, cut the onion in half so that it looks like this:
Now you can peel the onion, lay it down on its flat side, and start chopping.
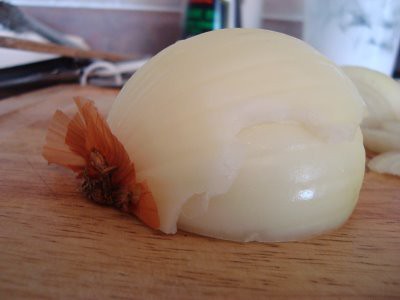
The "button" will hold the onion together so it doesn't fall apart while you're slicing.
Heat about a tablespoon of olive oil in a medium-sized frying pan, and throw in your onions.
Stir every few minutes so that the onions won't stick to the pan and will cook evenly.
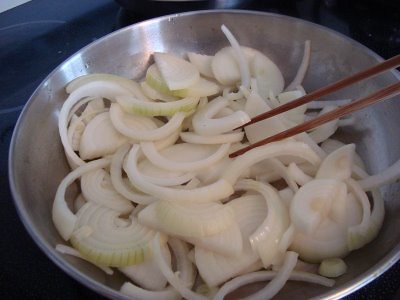
You're done when the onions look like this:
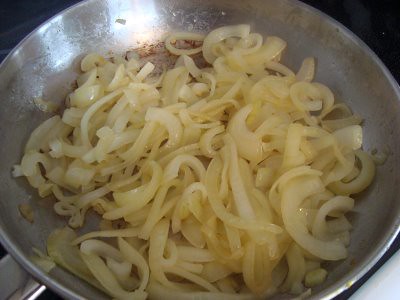
Scoop the cooked onions into a bowl.
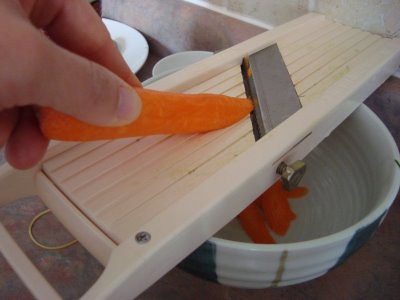
Take your mandoline and put the medium-sized teeth in. Set it on top of a bowl. Just like when you were slicing the zucchini, place the end of the mandoline flush against the wall to prevent it from sliding around while you're slicing the carrots.
Grab your carrots and peel them. Cut off the pointed ends.
Hold a carrot by its uncut end and run it across the teeth of the mandoline.
Hold your carrot on an angle to get longer strips. To prevent injury only slice the carrot in one direction, away from your body and toward the wall.
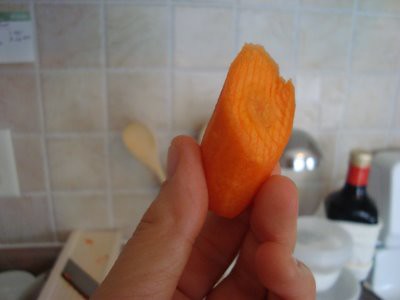
Stop slicing once you've sliced the carrot down to a couple of inches. Otherwise you risk cutting your fingers on the mandoline. Prepare all of the carrots in this way.
I like to nosh on what's left of the carrots as I'm preparing the rest of the bi bim bap.
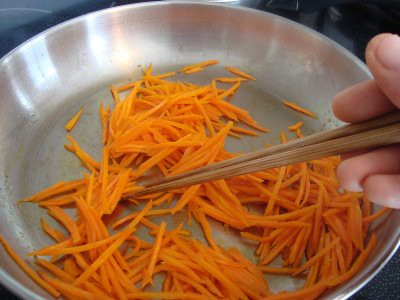
Heat another tablespoon-full of olive oil and toss in your carrots. Stir every couple of minutes to cook the carrots evenly.
You only need to cook the carrots for a few minutes. They'll turn a slightly lighter shade of orange when they're done.
Take all of the vegetables that you've prepared and arrange them neatly in a bowl.
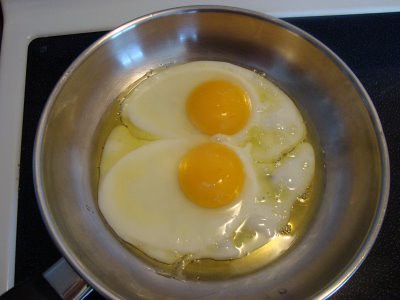
Fry a couple of eggs, sunny-side-up. The secret to sunny-side-up eggs that don't stick to your pan (assuming that you avoid teflon-coated pans) is to use low heat. Put the pan on low heat, drizzle in some olive oil once the pan's been warmed, crack in your eggs, and wait for them to cook. It takes a while, but the eggs won't stick, which means the yolks will stay intact. And intact yolks are generally considered to be essential for bi bim bap.
Scoop some cooked rice into a bowl. Add as much of each of the vegetables as you'd like. Slide an egg on top. Add a scoop of the Gochujang (if you can't tolerate spicy foods very well, either add only a little bit of Gochujang or omit it altogether).
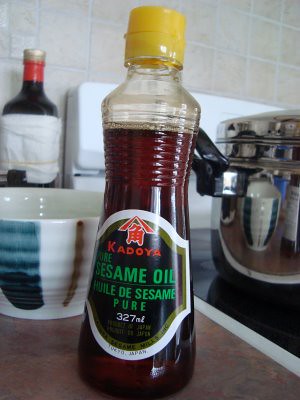
Drizzle with some sesame oil. This is the kind we use:
Nothing left to do at this point except mix well and enjoy.
Note from Ben: Here's a picture that we captured of our boys, all giddy with anticipation for Mama's bi bim bap. With a little practice, you can have this kind of giddiness over bi bim bap in your home, too.
If you're looking for a good mandolin, you should check out the one we use here:
Benriner Japanese Mandolin Slicer
If you can't order from Amazon, you are sure to find one of these puppies at your local Korean food market. We've had ours for several years now and have zero complaints.
Join more than 80,000 readers worldwide who receive Dr. Ben Kim's free newsletter
Receive simple suggestions to measurably improve your health and mobility, plus alerts on specials and giveaways at our catalogue
Please Rate This
Highest RatedNo articles have been rated for usefulness recently, please check later. | Related Posts | ||










Comments
The photos and videos are a
The photos and videos are a great idea!
Bimbimbap Recipe
I thought the photos and videos were fantastic as well.
Bibimbap
Loved the pics and videos. I am sure I can make it just like you have shown. Would love if you would show how to make my favorite Chinese dish-Chicken & Broccoli with fried rice- the healthy way. When we do take out, it is just dripping in oil -even the fried rice.
Bibimbap
I forgot to check the rating box. It's excellent!!
Bibimbap!
I love ordering bibimbap from my local Pan-Asian restaurant that's owned by a Korean family. Their recipe seems almost identical except that they use fresh field greens (not steamed) and add thinly sliced red bell peppers. It's a great dish and I'll have to try it at home sometime soon.
And I really enjoyed the photos you added. It's very helpful to know what the dish should look like from beginning to end and it also makes the recipe more exciting to read.
very detailed - great!
I am Chinese, but I love bibimbap, especially gobdol bibimbap at HanBat, my favorite Korean restaurant in NYC. I know all the veggies are yummy and healthy, but I have to say that my favorite part is the browned/burnt rice that sticks to the bottom of the cast iron pots. I don't eat rice like that anymore, but it's great comfort food!
Someone actually posted this very dish at HanBat on flickr--
http://www.flickr.com/photos/pabo76/2719403507/
Bi Bim Bap
The amaising Dr. Kim's multiple talents. Half way through the show i was singing Bi Bim Bap, chuba paluba, Bi Bim Bap (any one knows the song?), good recipe, I will only do the spinach and egg part...Bi Bim Bap
Bibimbap
Love the beautiful photos! Really helped me to visualize the recipe....and since it looked SO good....I HAD to make it...YUM! Would love to see more photos with other recipes.
comment on photos
I loved the use of photos in the recipe. It made it MUCH easier to understand, although I recognize it probably took lots of time to include them. The best photo was the one at the end of your sons!
Thanks for the wonderful bibimbap recipe!
Dear Dr. Kim,
I love the anticipation of reading your weekly health articles so it was a pleasant surprise that this one was a recipe of one of my favorite Korean dishes! Thanks so much for this wonderful recipe! I am going to try to make this weekend and then surprise everyone who loves to order this dish whenever we go to a Korean restaurant to eat.
Sincerely,
Sally
P.S. Can you post the recipe for vegetarian or seafood soondooboo, too? That's another one of my favorite Korean dishes!!! Thanks!
bibimbap recipe
I love the pictures and the videos included in the recipe. This is a great idea and added help to prepare a dish that's new to me. I only wish that you included a picture of the finished product...since I don't know what that would look like. Maybe next time?
Thanks, Beverley Keele
I LOVE bi bim bap! Thanks
I LOVE bi bim bap! Thanks for showing this! I think we might just have this for dinnner. Thanks again!
Would you be willing to post
Would you be willing to post a consolidated recipe without all of the pictures to make it a little easier to print? . . with pictures its 17 pages. . . Thanks!
I love the pictures and the
I love the pictures and the videos!! It would be great to have them with all the recipes, but since I know that is hard work, a picture of the finished product, at least, would be wonderful.
Thank you for the recipe, I'll have to try it soon.
Photos for recipe
Thank you for the lovely photos for the bibimbap recipe. At first I did not think they were necessary but they are useful! I like the tips such as how to cut the onion and slice the carrot safely as sometimes we forget over time, why we do or should do things a certain way in the kitchen. I would not have too many more photos per recipe. Thanks for the simple and healthy ideas.
Mandoli question on carrot cutting
I was wondering if the Madolin is what "Juliennes" the carrots. I have always wanted a tool that shreds them that way. It looks like the Mandolin just cuts them in flat slices, are they really juienned instead and have not fallen apart yet under the mandolin in the bowl in the picture?
yes the mandolin juliennes
yes the mandolin juliennes the carrots, most come with a special blade just for that purpose. Also try and get a special cut-proof glove to wear when using the mandolin (they like to snack on fingers LOL)
Love it, love it, love it!
Love it, love it, love it! Cannot wait to try this one. I agree with everyone else... the pics are very helpful. Seeing the pics, who wouldn't want to make this?
That looks good enough to eat!
No wonder your boys are doing the happy dance!
Pics and recipe
First of all, the children are sooooooo cute. I really loved seeing their joy. This recipe is great. I have some spring roll wraps in the cupboard and just keep wondering how I should proceed. Thanks for the recipe!
bibimbap
hi,
thank you very much for the recipe.. i always rate a korean restaurant by its bibimbap, simply because it is my favorite dish.
i notice tho that they always serve it in an iron pot, so i thought that was pretty much the traditional way koreans eat it?
how does one use the iron pot?
wish you could have shown us the picture of the kids, then we could have voted if they are more korean or more chinese..
more power to you!
etp
Bibimbap
I love the photos. While I can usually visualise a recipe, I'm a second-guesser so it's nice to see how it should look through every step (including the anticipation of one's culinary audience). I love bibimbap and this recipe looks nice and easy.
A question for anyone who might be able to help: is it possible buy "healthy" gochujang? I don't like a lot of the ingredients in the kinds I see at the store. I'd really appreciate if someone has tracked some down and can point the way!
MY FAVOURITE FOOD
Thanks Doc
This is my FAVOURITE food ever, since I was introduced to it in 2002 during my visit to South Korea.
I don't like vegetables, vegetables don't like me. But we get along just FINE when in this dish.
It's so healthy, vegetarian AND tastes so good, you can never go wrong with this.
Thanks for sharing :)
yum!
You bibimbap looks very different than mine in some ways, very similar in others...I was taught how to make this dish by a dear Korean-American friend. I love the picture of your kids at the end--mine feel the same way when they find out this is what we're having for dinner! Will have to try your version some time, it looks healthier than the one we make :)
Seriously awesome! Thank you
Seriously awesome! Thank you so much! It helped me very much when making my own for the first time. I used a few more veggies (bean sprouts, mushrooms)and I didnt do onions. It was soooooo good!!! Now I dont have to go out for it anymore, I can make it at home! Thanks so much!!
Using olive oil for stir
Using olive oil for stir frying is not recommended. It has something to do with the breakdown of oil in high heat. You should just use vegetable oil next time.
Anyway this is a very helpful recipe. I can't wait to try bibimbap! :)
cooking oil
try using coconut oil for cooking instead. its healthier.